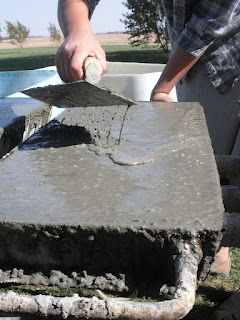
Today instead of whipping up a batch of cookies, we're mixing concrete. I'll give you the recipe and a view of our latest concrete job.
What you will need:
1 part Type 1 Portland Cement
(how much a part is depends on how much concrete you want to make,
1 part could be 1 teaspoon, 1 coffee can, 1 bucket, or 1 ton.
Just be consistent and keep the proportions right; proportion is the important part.)
2 Parts Sand
3 parts rock (We use a mixture of gravel and pea gravel...
2 parts gravel and 1 part pea gravel does the job).
Make sure your rock and sand is clean. Dirt, sticks, and leaves would make the concrete weaker.
For a small operation like ours, a wheelbarrow is a great for mixing the concrete in. So, we pour 1 part cement, 2 parts sand, and 3 parts gravel/pea gravel into a wheelbarrow.
Next, grab a shovel and mix the dry ingredients.
Add a little less than 1 part water.
Mix thoroughly.
 |
| This mixture is rather wet, your mixture should appear slightly drier. |
After the concrete is thoroughly mixed (everything should be gray and you should not be able to see any sand), you can put the concrete to work.
We make concrete pads for propane tanks, so we pull out our forms, grease them with oil (to make the finished concrete pads slip out easier), and set them on a work table.
The forms are filled about 3/4 full with concrete. Then the re-bar goes in.
The forms are filled completely, and then smoothed with a finishing trowel.
Next the concrete should be vibrated, but if you don't have a vibrator handy--we don't--move the form to the edge of the work table and bounce the form 50 times up and down.
 |
| Concrete after vibration (shaking) |
The forms are then carried to the rack seen in the photo so that the table can be used for other projects. My sister grabs the finishing trowel and re-finishes the concrete, adding extra where it is needed so the forms are full and the concrete is smooth.
The concrete is then left to dry in the forms for a few hours (the exact number of hours depends on weather conditions. If it is hot and dry the concrete dries more quickly). When the concrete looks solid, it is moved in the forms into large tubs of water to be cured.
Water curing is one of the most effective methods of curing concrete. It retains moisture so that the concrete can become stronger and it delays shrinkage until the concrete is strong enough to resist shrinkage cracking.
After a day (2 days in cold weather), the concrete is taken out of the forms. The concrete pads are placed back into the water for about a week.
The finished product:


Very impressive operation! I saw the setup at your place but it was nice to have photos showing the different stages from start to finish. Thanks for sharing!
ReplyDelete